
Download and print the menu QR code: formats and sizes in WebQRMenu
Find your menu QR code in WebQRMenu, pick a format (PNG, JPG, SVG, PDF, EPS) and a size from 512px to 4K, and print it so it scans.
The store menu QR is not on a separate “QR list” page. It lives on the store card in Stores and on the store overview header. From either place you open a small popover, press Download, and choose a file format and (for raster formats) a size — or send the code straight to the system print dialog.
Related reading: How to design a QR code in WebQRMenu, Tables and a separate QR code for every table, Where to place QR codes in a restaurant or cafe, Table QR vs general menu link.
In short: Stores → QR icon on the store card, or open the store → QR button next to Open menu. In the popover: Download (formats/sizes), Edit (designer), Tables (per-table QRs). In the dialog pick PNG / JPG / SVG / PDF / EPS or Print. Raster sizes: 512px, 1024px, 2K (2048px), 4K (4096px). The dialog remembers your last choice. Print large enough to scan, keep contrast and a quiet zone, then test with a phone.
1. Where the menu QR lives
Stores list — card icon
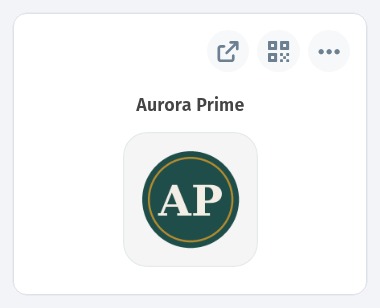
Open Stores. On the Aurora Prime (or your) store card, the top-right icon row has an external-link control, a QR icon, and ⋯. The middle QR icon opens the menu-QR popover for that store.
Store overview — header button
Open the store (overview). Under the title, the action row starts with a square QR button, then Open menu, and the store pill on the right. The same popover opens from this QR button.

There is no separate dashboard list of menu QRs — these two entry points are the ones to use for the store-wide code.
2. The QR popover: Download, Edit, Tables
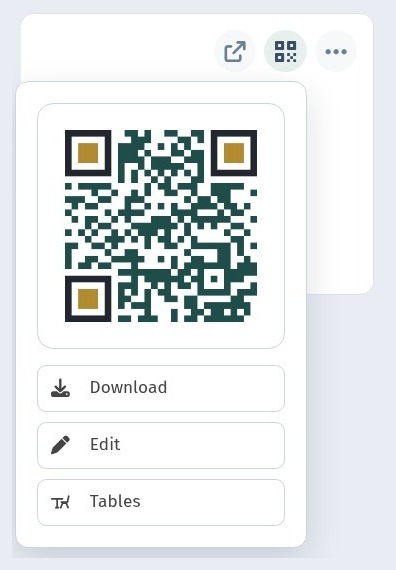
Click the QR icon (card or overview). A white popover shows a live preview of the designed code and three actions:
- Download — opens the download / print dialog (formats and sizes below).
- Edit — opens the QR designer (colours, modules, eyes, logo). Setup is covered only in How to design a QR code in WebQRMenu; this article does not retell the designer.
- Tables — goes to table QRs. Each table can have its own code; that flow has its own guide: Tables and a separate QR code for every table.
3. Download dialog: every format and when to use it
Press Download. The dialog Download QR Code lists File format options. Each format comes with a short hint:
| Format | UI hint | Practical use |
|---|---|---|
| PNG | Best for web and social media | Sites, Instagram / Facebook posts, messengers, slides. |
| JPG | Compressed raster image | When you need a smaller file and can accept compression (email, some CMS uploads). |
| SVG | Scalable for any size | Websites, digital screens, any place the code must stay sharp at any zoom. |
| Ready for print | Send to a print shop or print yourself without converting. | |
| EPS | Vector for print | Classic vector hand-off for print shops and layout tools that prefer EPS. |
| Open the system print dialog | Skips a file download and opens the OS / browser print dialog so you can print now. |
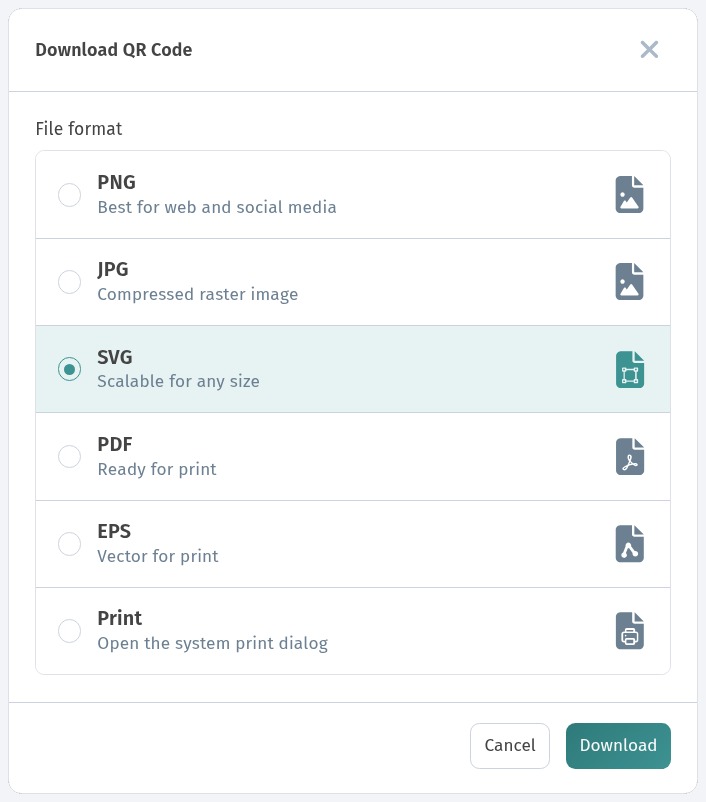
Footer: Cancel closes without downloading. The primary button is Download for file formats, and switches to Print when Print is selected.
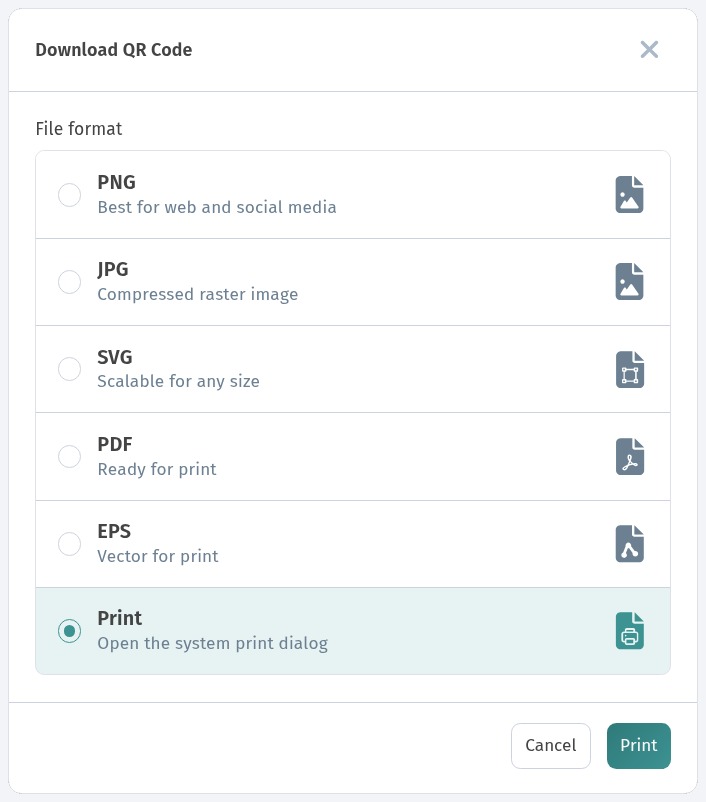
The dialog remembers your last choice (format and, when relevant, size). Opening it again after a Print session may show Print already selected — just switch the format.
4. Sizes for PNG and JPG: 512 → 4K
When PNG or JPG is selected, a Size block appears under the format list:
- 512px — Small
- 1024px — Medium
- 2K (2048px) — Large
- 4K (4096px) — Extra large
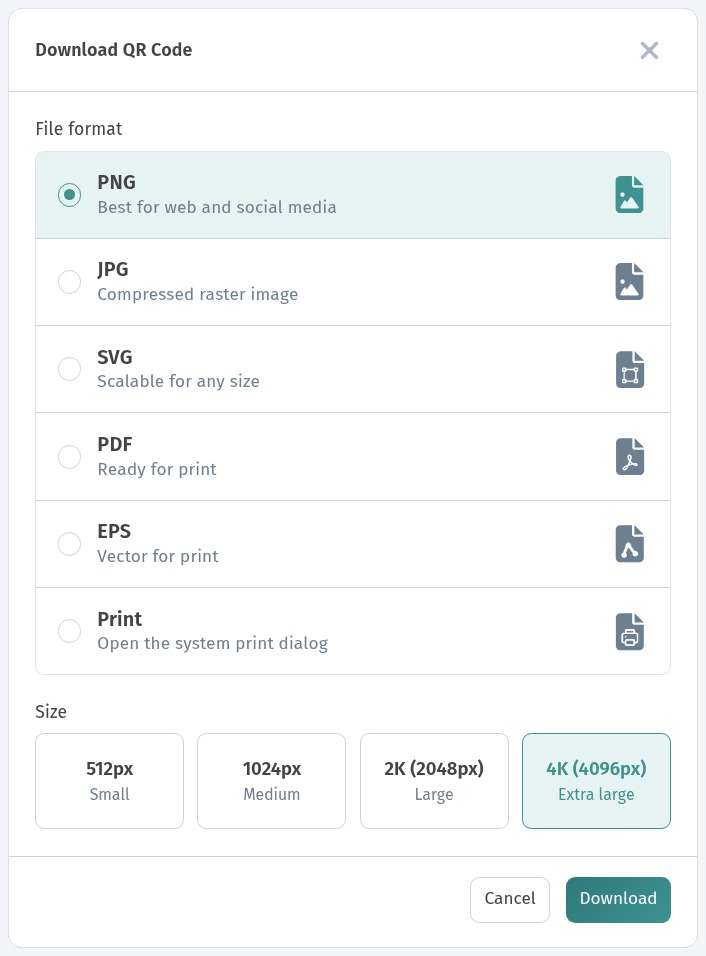
Practical guidance (not hard product limits — match the surface):
- 512px — digital previews, small on-screen badges, chat avatars. Too small for a table tent if you print it large.
- 1024px — solid default for social posts and many digital uses.
- 2K — table tents, A6/A5 cards, counter stands where the printed code is a few centimetres across.
- 4K — posters, window stickers, large boards; gives the print shop headroom to scale down cleanly.
SVG, PDF, EPS, and Print do not show the size row — vector / print paths do not need a pixel width the same way.
5. Print tips that actually help scanning
- Test-scan every new print with a phone before you laminate or order a batch.
- Keep the printed code at least about 2–3 cm on the short side for a table tent; go larger for windows and distance scanning.
- Prefer high contrast (dark modules on a light quiet background). Busy photos behind the code hurt scans.
- Leave a quiet zone — empty margin around the code; do not crop into the white margin around the code.
- For paper in the hall, PDF or Print is usually enough; for a design agency or press, prefer SVG / EPS / high-res PNG.
- Placement ideas (entrance, tables, bar): Where to place QR codes in a restaurant or cafe.
6. Checklist
- Stores → QR icon on the store card, or store overview → QR button next to Open menu.
- Popover → confirm the preview looks right → Download (or Edit / Tables if that is the goal).
- Choose format: web/social PNG, compressed JPG, scalable SVG, print-ready PDF, press EPS, or Print for the system dialog.
- For PNG/JPG pick 512 / 1024 / 2K / 4K to match the physical or digital size.
- Download or Print → test-scan → check contrast and quiet zone.
- Need a different look? Edit → designer guide. Need per-table codes? Tables → tables guide.