

Workspaces and team in WebQRMenu: roles, email invitations and moving stores
Once a restaurant has more than one person working in the dashboard, a single personal account quickly gets in the way. The manager edits the menu, the chef watches the kitchen line, and the owner wants to see the numbers. Workspaces let your team work on stores, menus, tables and orders together, and each person gets a role that decides what they can do.
This guide walks through every step in the dashboard: creating and editing a workspace, the members page, inviting a colleague by email with a role, managing invitations that have not been accepted yet, the workspace switcher in the sidebar, moving a store into the workspace and finding it there afterwards.
What you need: a WebQRMenu account on a plan that includes workspaces (Premium, Business or Enterprise; see the limits below) and the email address of the colleague you want to invite.
Which plans include workspaces
The number of workspaces and the number of members per workspace depend on your plan:
| Plan | Workspaces | Members per workspace |
|---|---|---|
| Starter | not available | — |
| Premium | 1 | up to 5 |
| Business | up to 10 | up to 25 |
| Enterprise | up to 50 | up to 50 |
Starter cannot create workspaces. Keep in mind that menu resources inside a workspace still follow your plan's separate limits for Menu QRs, stores, content sets, tables, waiters and orders. Current numbers are always on the pricing page.
Step 1. Create a workspace
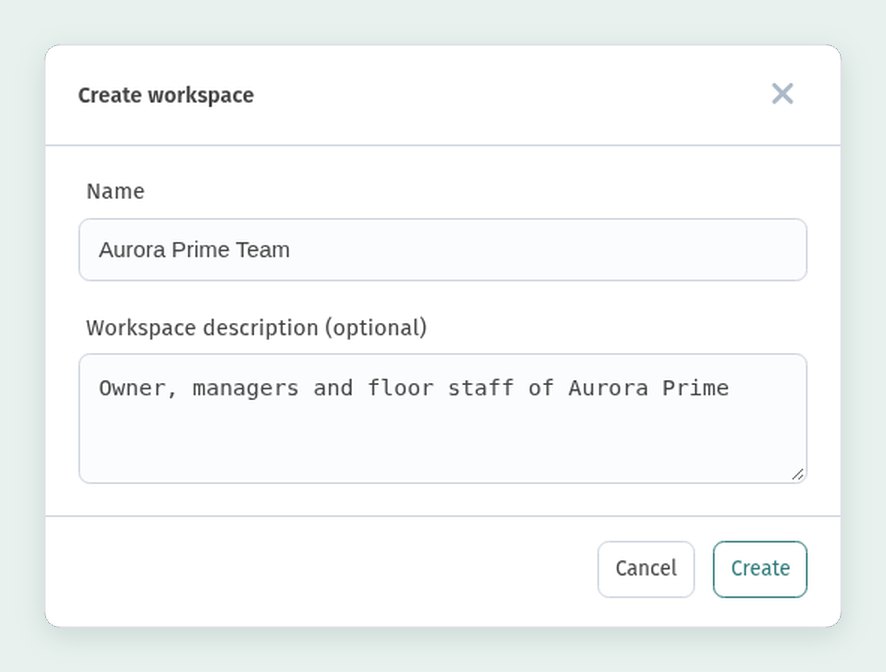
In the sidebar, expand Workspaces and click Workspace list. At the top of the Workspaces page, click Create workspace.
A dialog opens with two fields:
- Name: the name your team will see, for example Aurora Prime Team.
- Workspace description (optional): a short note about who the workspace is for, for example "Owner, managers and floor staff of Aurora Prime".
Click Create. Cancel closes the dialog without creating anything.
Step 2. The workspace list
The new workspace appears as a card on the Workspaces page. The card shows the Workspace description, the Owner (the account that created the workspace) and the Created and Updated dates.
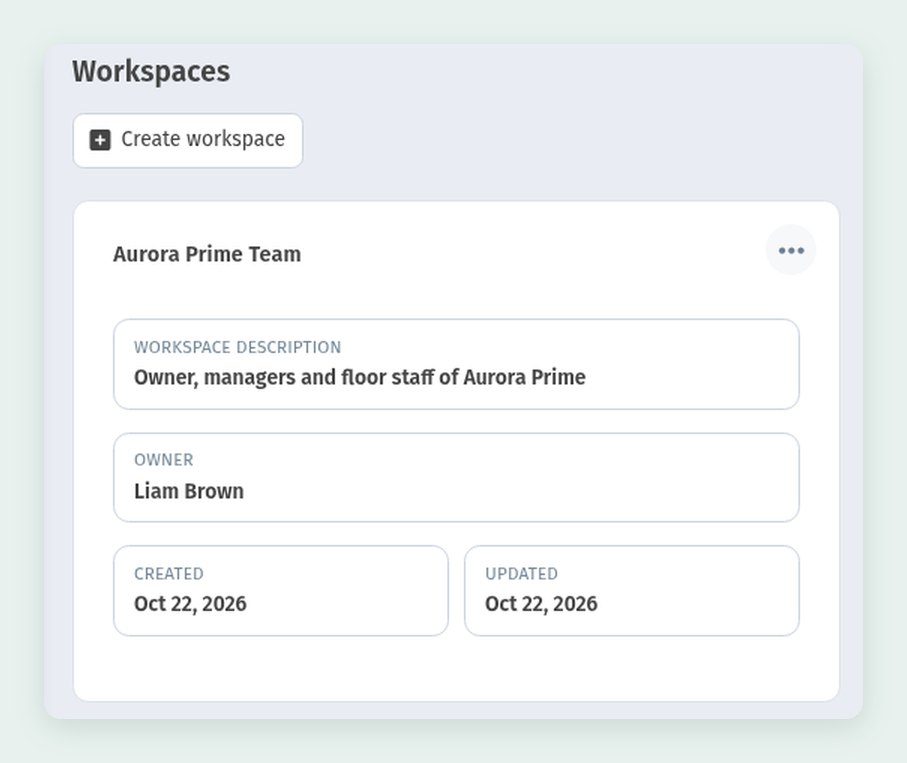
If you create several workspaces (Business and Enterprise allow more than one), each of them gets its own card here.
Step 3. Edit or delete a workspace
Click the ⋯ button in the top right corner of the card. The menu has two items: Edit and Delete.
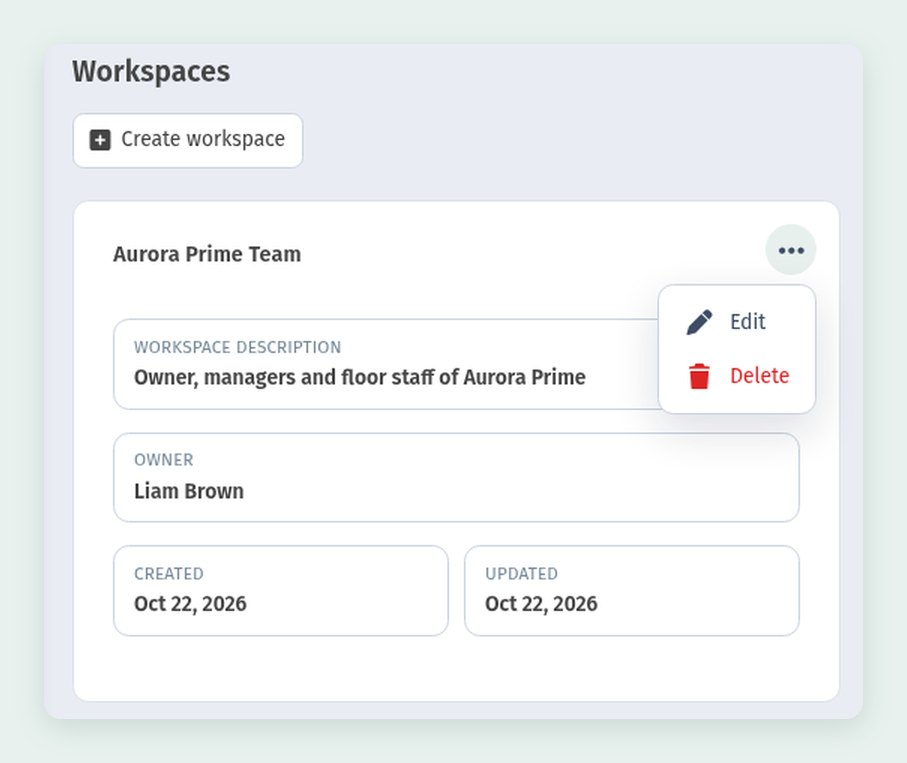
Delete removes the workspace. According to the WebQRMenu FAQ, when a workspace is deleted, all QR codes created in it are moved to your personal space, so they are not lost.
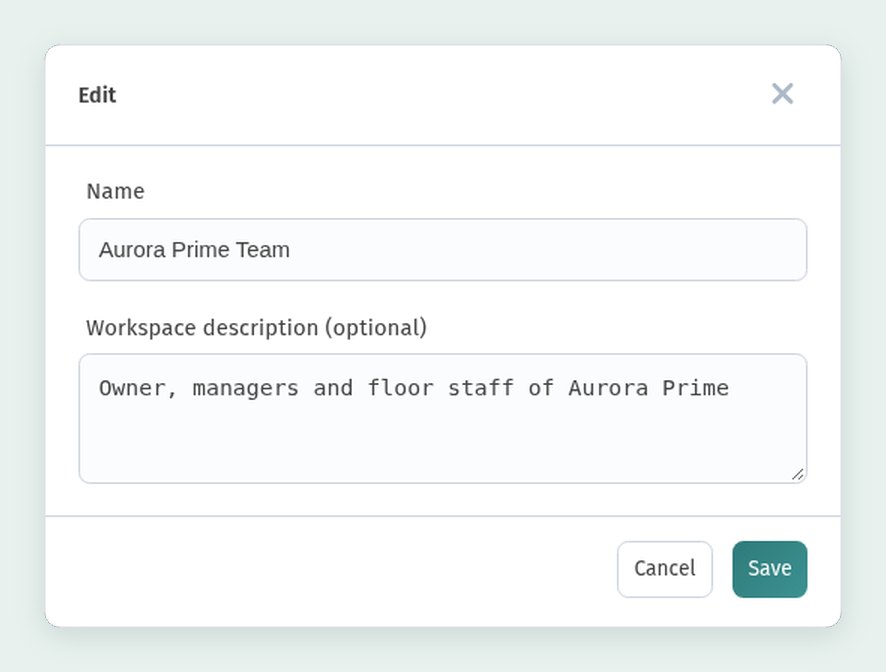
Edit opens the same form as when you created the workspace. Change the Name or the Workspace description (optional) and click Save.
Step 4. The Members page
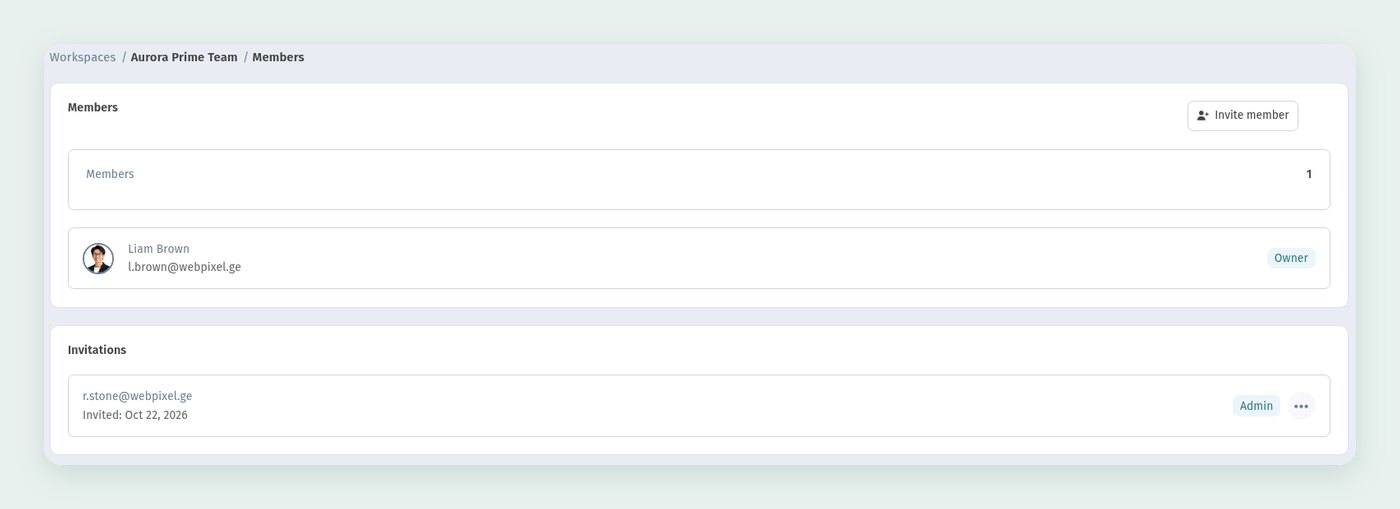
The members of a workspace are managed on its Members page. You can open it from the workspace switcher in the sidebar (see step 8): Workspaces → All Workspaces → Aurora Prime Team → Members. The path at the top of the page shows where you are: Workspaces / Aurora Prime Team / Members.
The page has two blocks:
- Members: the number of members and a list of everyone who has already joined, with their name, email and role. The creator of the workspace is marked Owner.
- Invitations: invitations that have been sent but not accepted yet. Each one shows the email address, the date (Invited: …) and the role the person will get.
The Invite member button is in the top right corner of the Members block.
Step 5. Invite a member by email
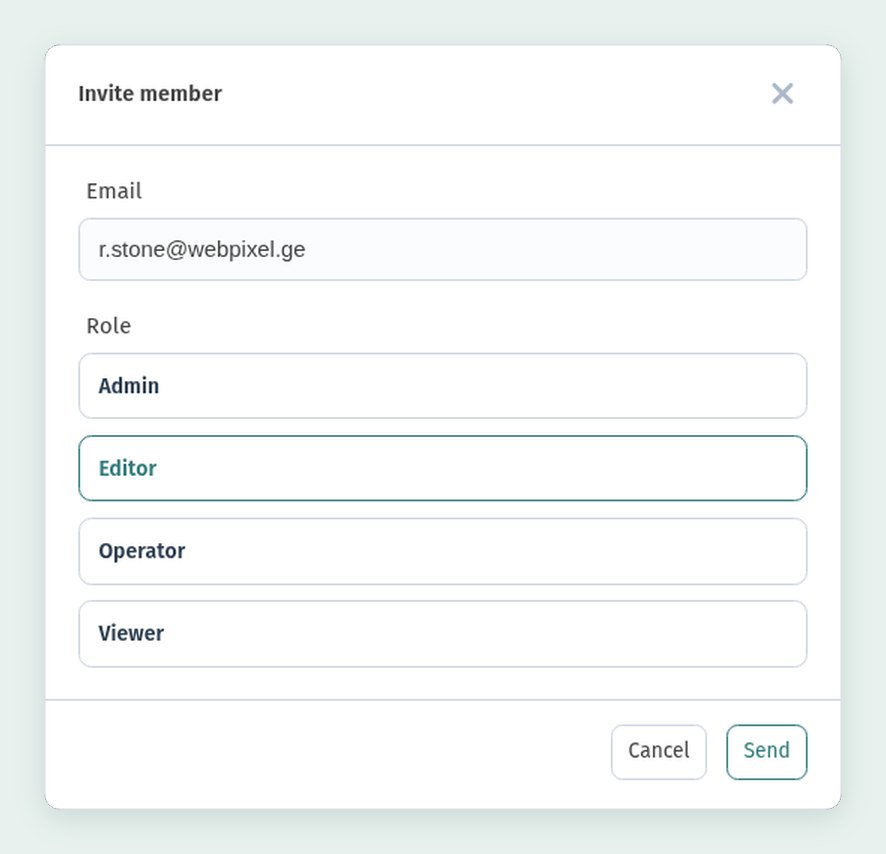
Click Invite member. The dialog has two parts:
- Email: the address of the person you are inviting.
- Role: four options, Admin, Editor, Operator and Viewer. The selected role is highlighted.
What each role can do
WebQRMenu describes the roles like this:
- Owner: full control over the workspace. Manages members and their roles, creates and edits, can delete the workspace and manages the subscription. You do not assign this role in the invitation form: the owner is the account that created the workspace.
- Admin: manages members (except the owner), creates and edits, works with store settings, views analytics and manages workspace settings.
- Editor: creates and edits content; can delete menus, tables and related materials; works with the order line, store settings, order types and colors; views analytics and the member list.
- Operator: works on the kitchen and bar line: order statuses, hold and ready. On that screen they can set their own sounds, station and which order types to show. They cannot change the menu, colors or store settings and cannot manage members.
- Viewer: also offered in the role list of the invitation form.
A simple rule of thumb: give Admin to a manager who runs the venue with you, Editor to the person who keeps the menu up to date, and Operator to kitchen and bar staff who only need the line screen.
Step 6. Choose the role and send the invitation
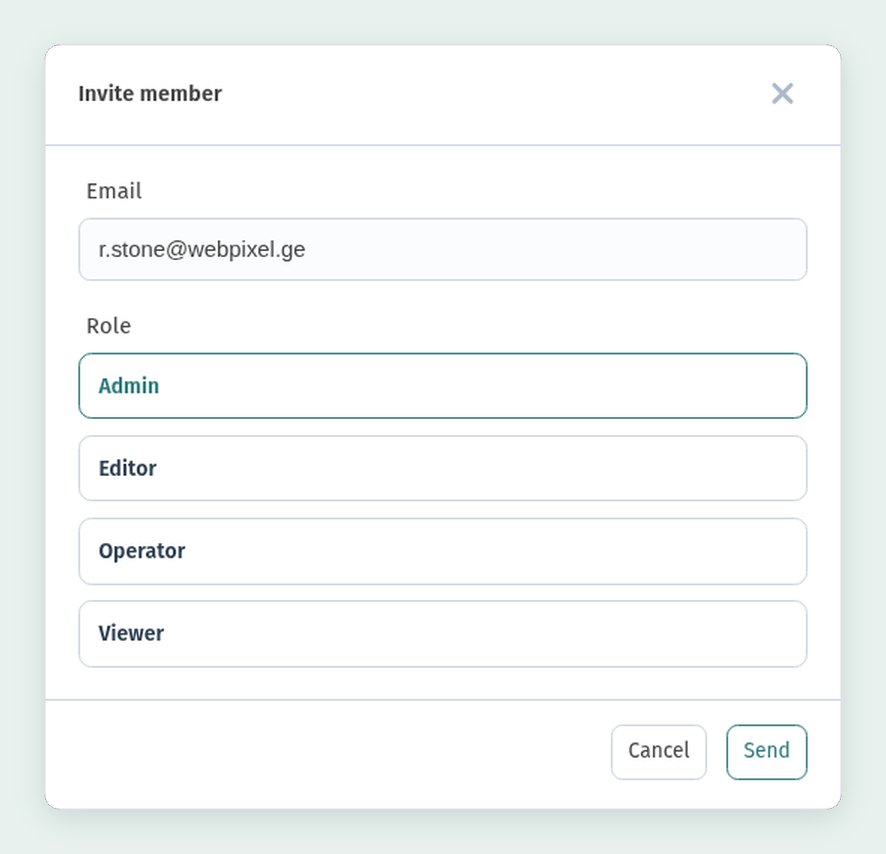
Enter the email address, click the role you want (in our example Admin) and click Send.
The person receives an email invitation with a notification and can join the workspace. One person can be a member of any number of workspaces, even ones they do not own. Invitations they have received can be found in their own account: the workspace switcher has a View invitations to join link (see step 8).
Step 7. Manage pending invitations
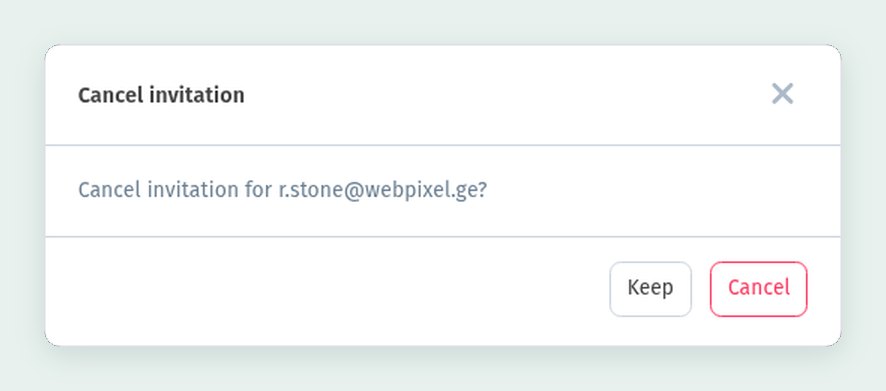
Until the person accepts, the invitation stays in the Invitations block with its email, date and role. If you invited the wrong address or picked the wrong role, click the red trash icon in the Actions column next to the invitation and confirm with Cancel (the Keep button closes the dialog without changing anything). You can then send a new invitation with the right details.
Workspace members vs. waiters
Do not confuse a workspace invitation with a waiter invitation. Waiters are invited separately, to a content set, from the Staff card in the menu content module (next to Tables). There you can assign tables to a waiter so that guests call their own waiter from those tables. The waiter must be registered in WebQRMenu with the same email. A workspace invitation, on the other hand, gives a person access to the shared workspace with the role you choose.
Step 8. The workspace switcher
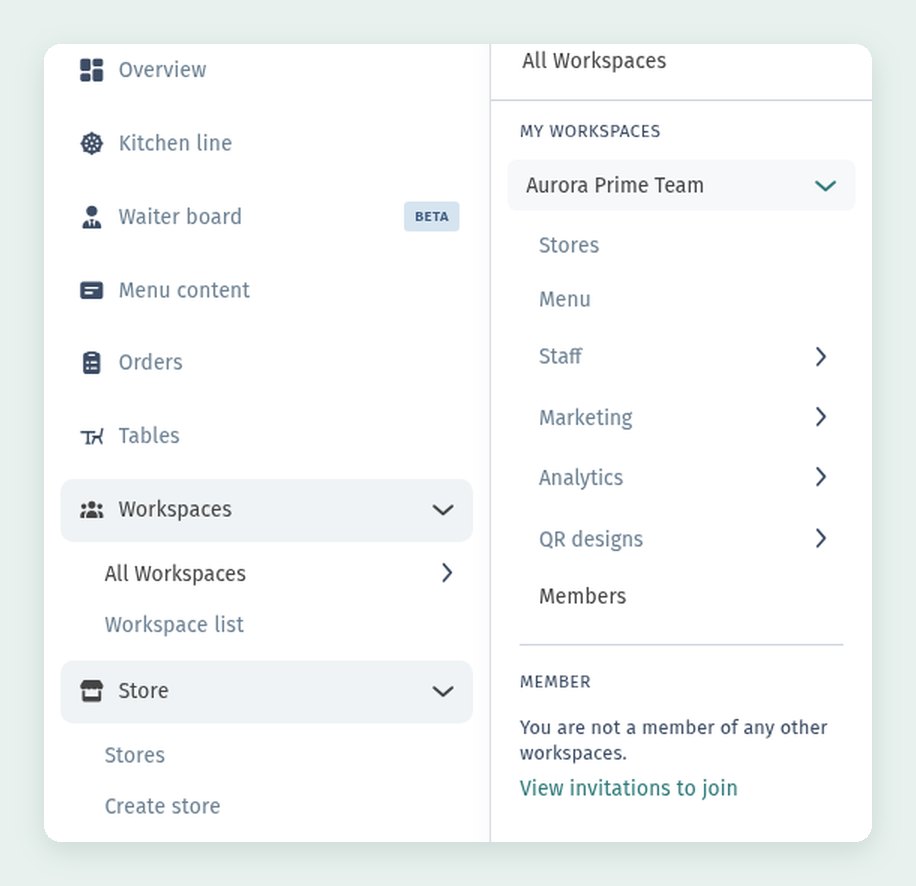
In the sidebar, under Workspaces, click All Workspaces (the item with the arrow). A panel opens next to the sidebar:
- My workspaces: the workspaces you own. Click a workspace to expand its sections: Stores, Menu, Staff, Marketing, Analytics, QR designs and Members. This is how you open the Members page from step 4.
- Member: workspaces where you are a member but not the owner. If there are none, you will see "You are not a member of any other workspaces." and the View invitations to join link.
Step 9. Move a store into the workspace
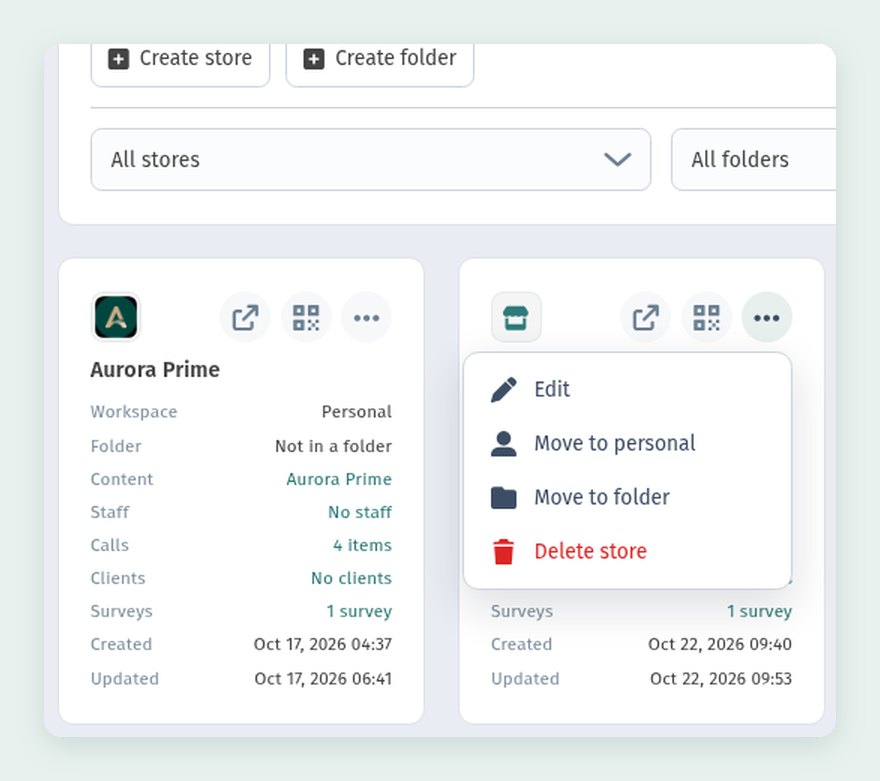
A workspace becomes useful once your stores are in it. In the sidebar, open Store → Stores. Each store card has a ⋯ button in its top right corner. Click it on the store you want to move (the second screenshot shows the personal store Aurora Prime — a store that is already in a workspace has no Move to workspace option). The menu shows Edit, Move to workspace, Move to folder and Delete store. If the store is already in a workspace, Move to workspace is replaced by Move to personal, which returns the store to your own list.
Click Move to workspace.
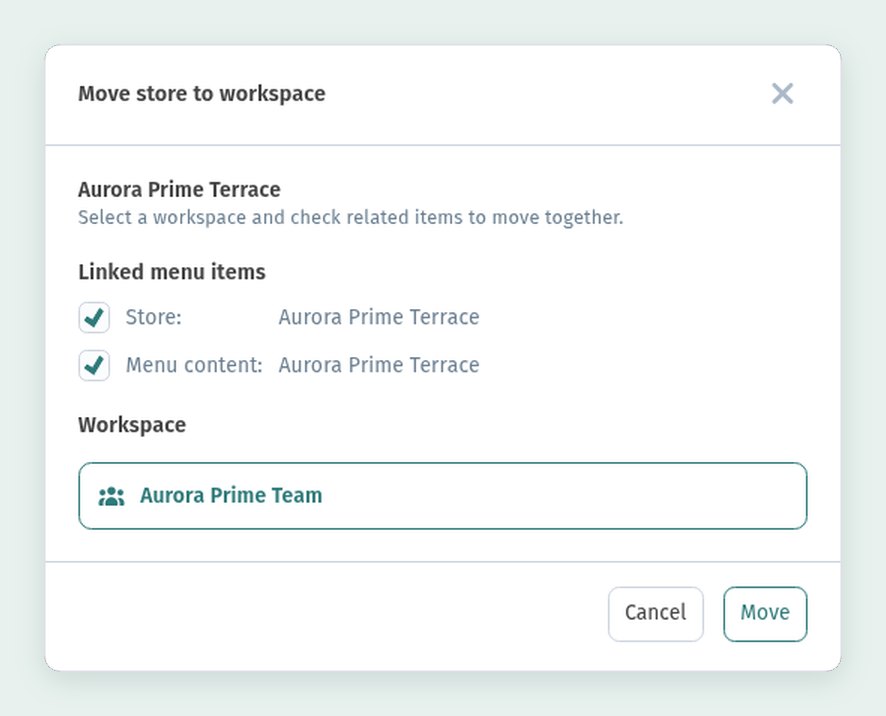
The Move store to workspace dialog opens. At the top you see the store name (in our example Aurora Prime Terrace) and the hint "Select a workspace and check related items to move together."
- Linked menu items: the items connected to this store, each with a checkbox, here Store and Menu content. Leave both ticked to move the store together with its menu content.
- Workspace: choose the workspace to move them into, here Aurora Prime Team.
Click Move. The dashboard confirms that the store has been moved.
Step 10. The store on the workspace Stores page
Now open the workspace switcher again and click Stores under Aurora Prime Team. On the Stores page, the filters at the top are set to Workspaces and Aurora Prime Team, and the list shows the store you have just moved, Aurora Prime Terrace. Your other store, Aurora Prime, was not moved and stays among your own stores.
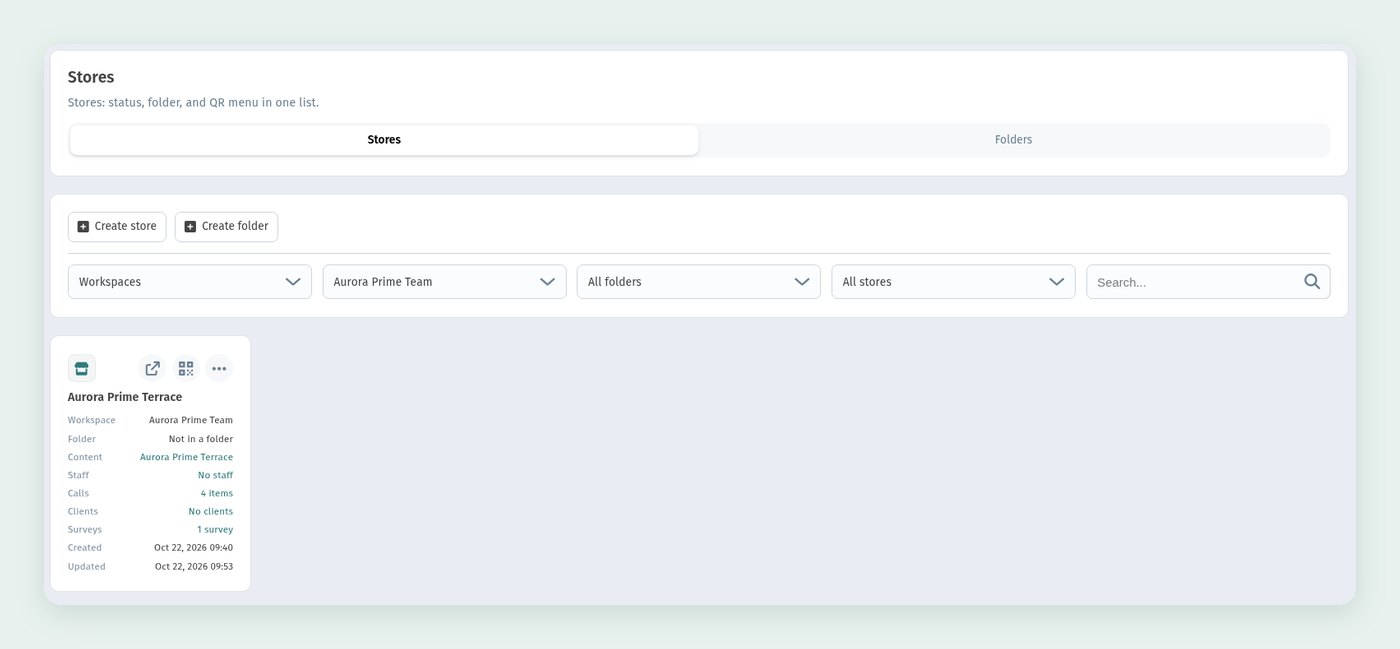
From now on, members of the workspace work with this store according to their roles.
Quick checklist
- Workspaces → Workspace list → Create workspace: enter a name and, if you like, a description.
- Use ⋯ → Edit on the card to rename the workspace or change its description.
- Open All Workspaces → your workspace → Members.
- Invite member: enter the email, choose Admin, Editor, Operator or Viewer, and click Send.
- Check pending invitations under Invitations, and cancel any wrong ones with the red trash icon in the Actions column, confirming with Cancel.
- Store → Stores → ⋯ → Move to workspace: tick the store and its menu content, choose the workspace and click Move.
- Check the store on the workspace's Stores page.