
QR codes on tables, storefronts and delivery packaging: which captions and CTAs work best
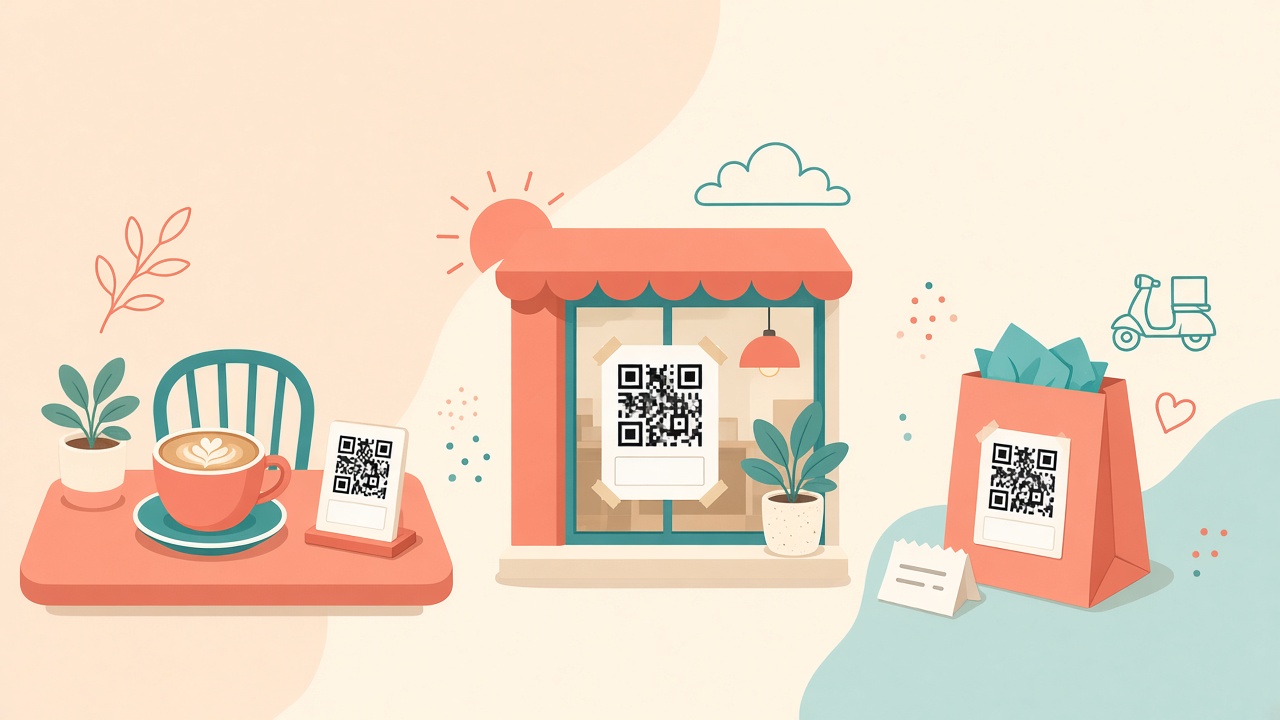
The same QR code behaves differently depending on where it lies. A guest at a table is already in your restaurant and wants the menu fast. Someone passing your window has not decided to come in yet. A person holding your delivery bag has already eaten — the question is whether they will come back. The caption under the code should answer that question, not just say "scan me".
The good news: in WebQRMenu you don't need a graphics editor to add the caption. It is part of the QR design itself, in the Text Under QR Code field, and it is included in the downloaded file. Below is how to set it up step by step, plus the wording that fits each spot.
What you need: a WebQRMenu account with a store and about fifteen minutes. Our examples use the demo restaurant Aurora Prime and its menu at
webqrmenu.io/kqnx5i.
Where captions live: QR designs
In the sidebar open QR designs. This is where saved designs live, ready to apply to any code: the QR designs page with Create New Design and Create folder buttons. It is worth saving one design per spot — "tables", "window", "packaging" — so you can simply download the right version later.
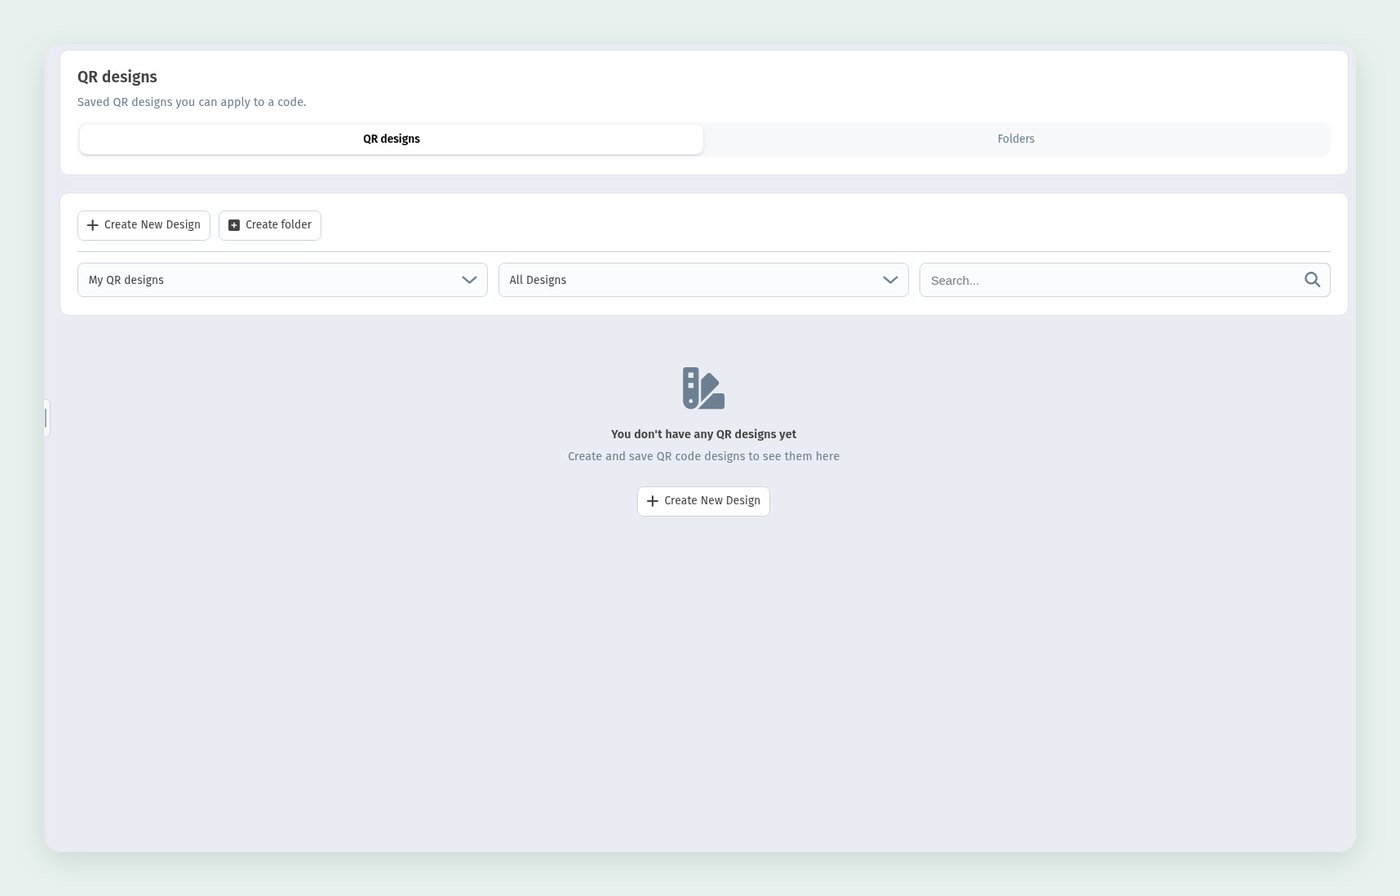
Click Create New Design. A two-step wizard opens — 1 Design and 2 Settings — with a live preview on the right. You see exactly how the caption will look in print.
Step 1. A calm, readable code
The Shape style section controls module shapes and colours. For printing on napkins, stickers and packaging, contrast matters more than decoration: dark dots on a light background. We kept Background color at white (#FFFFFF) and set Dots Color to #22262E, a very dark graphite instead of pure black.
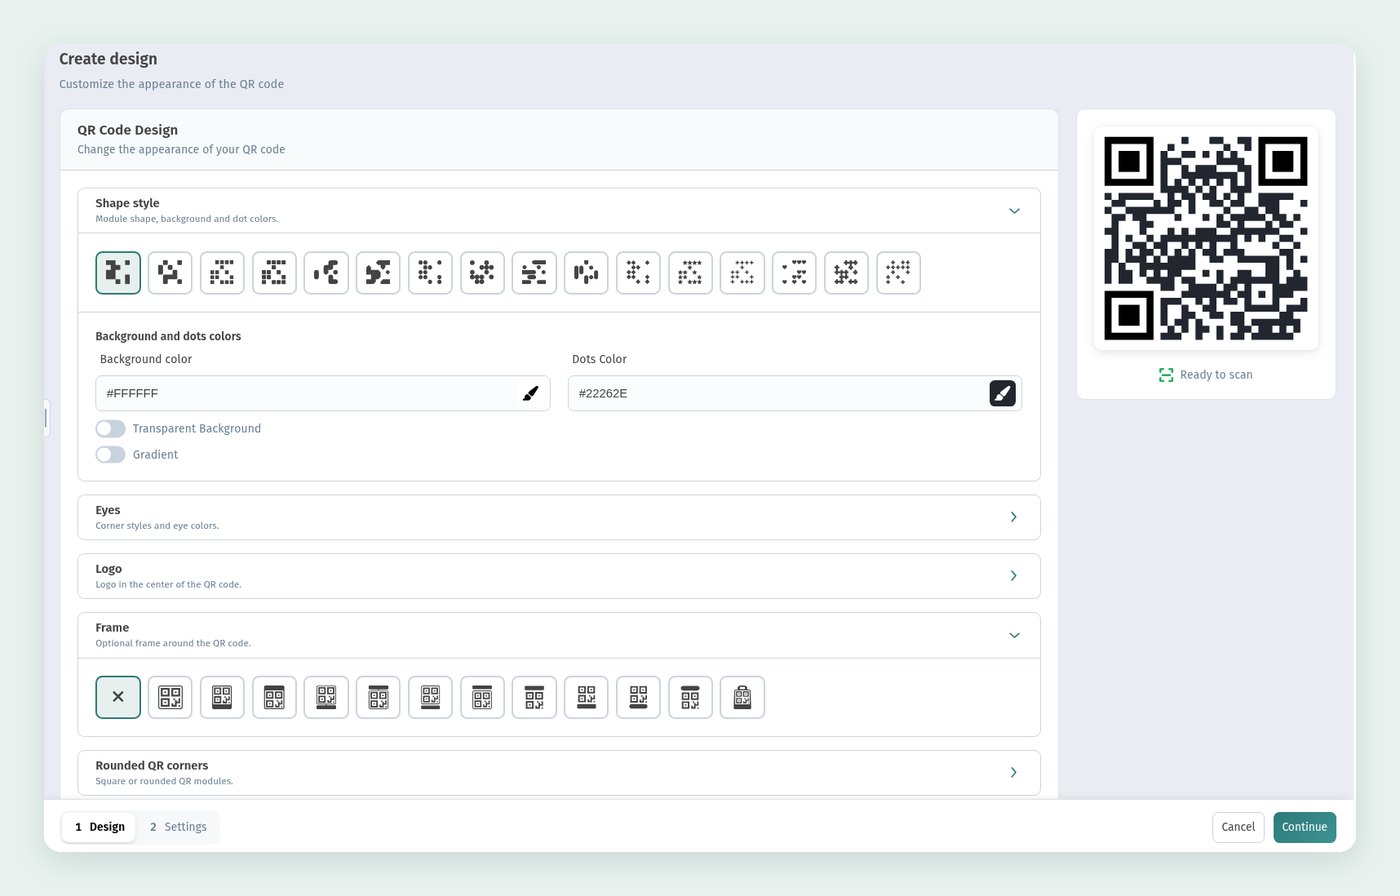
Avoid light dots on a dark background "for style": some cameras and printers read inverted codes noticeably worse, and packaging print reduces contrast even further.
Step 2. A frame unlocks the caption field
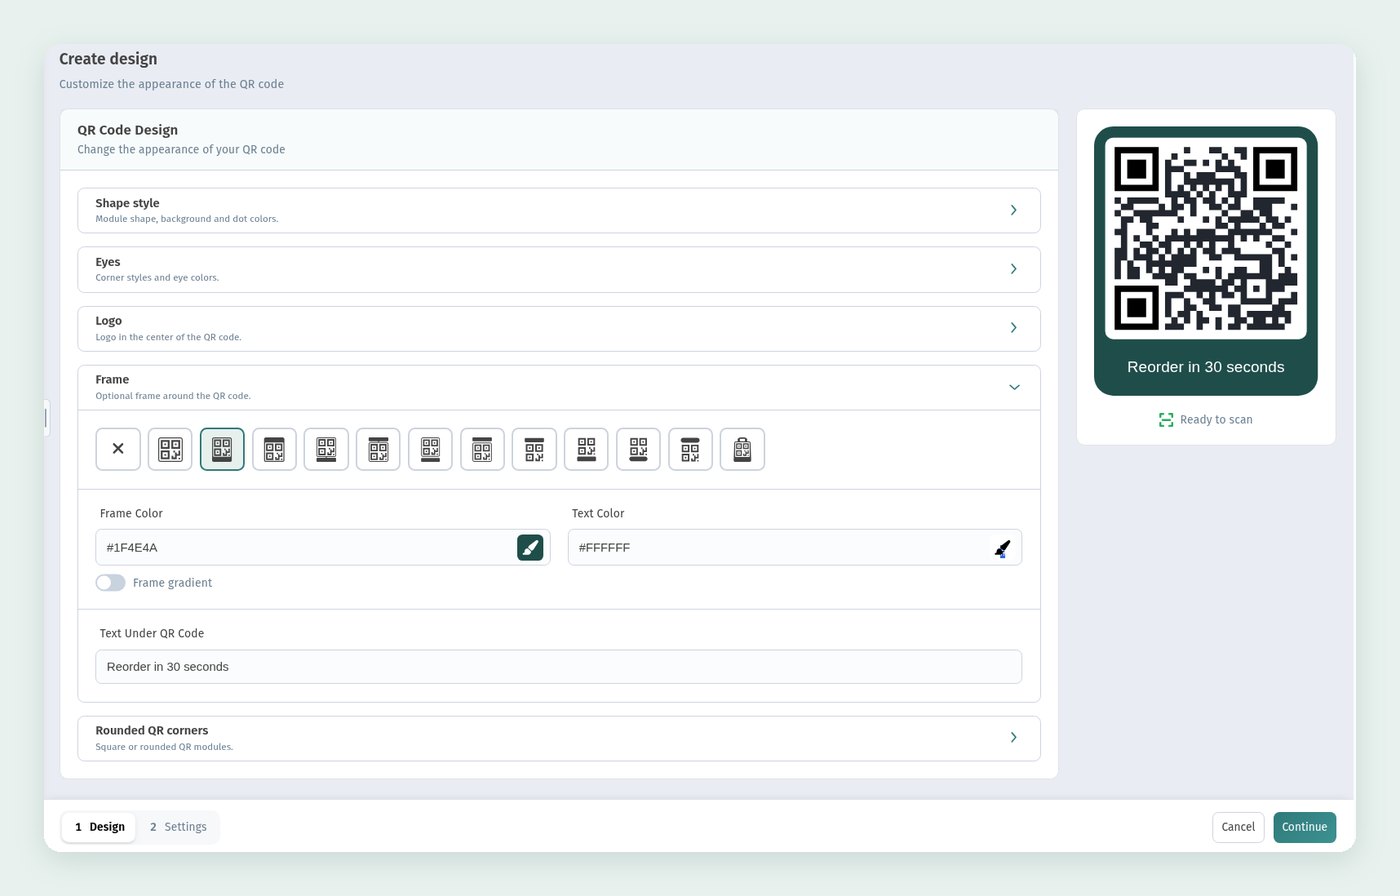
Scroll to the Frame section. There are twelve styles: No Frame, frames with labels above and below, slim bars, a Shopping Bag and more.
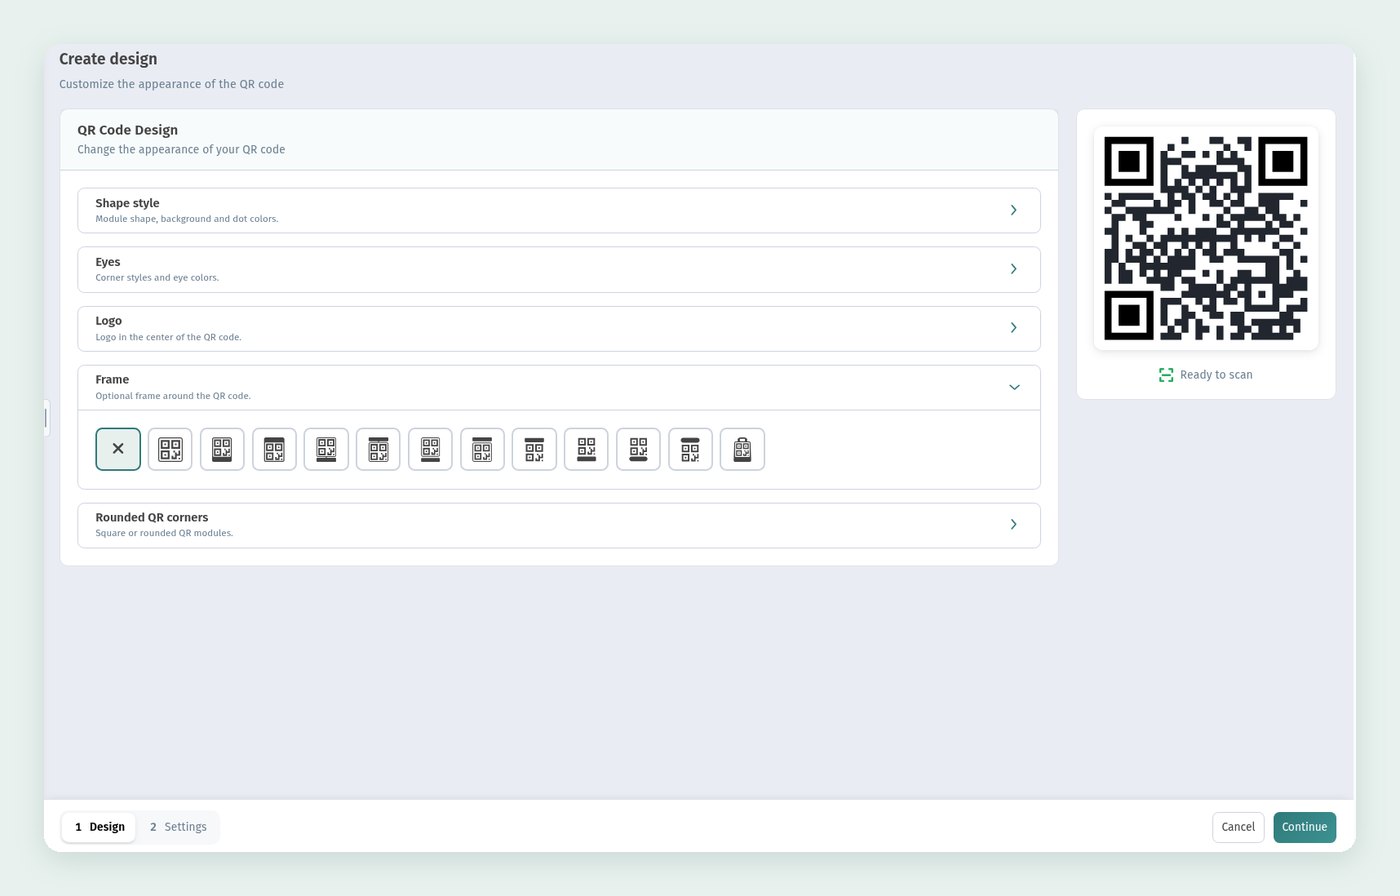
The caption field appears only with text frames. Choose Label Bottom: below the preview you now get Frame Color, Text Color, Frame gradient and the field we need — Text Under QR Code, with the default caption SCAN ME. It holds up to 40 characters, so the wording has to be tight.
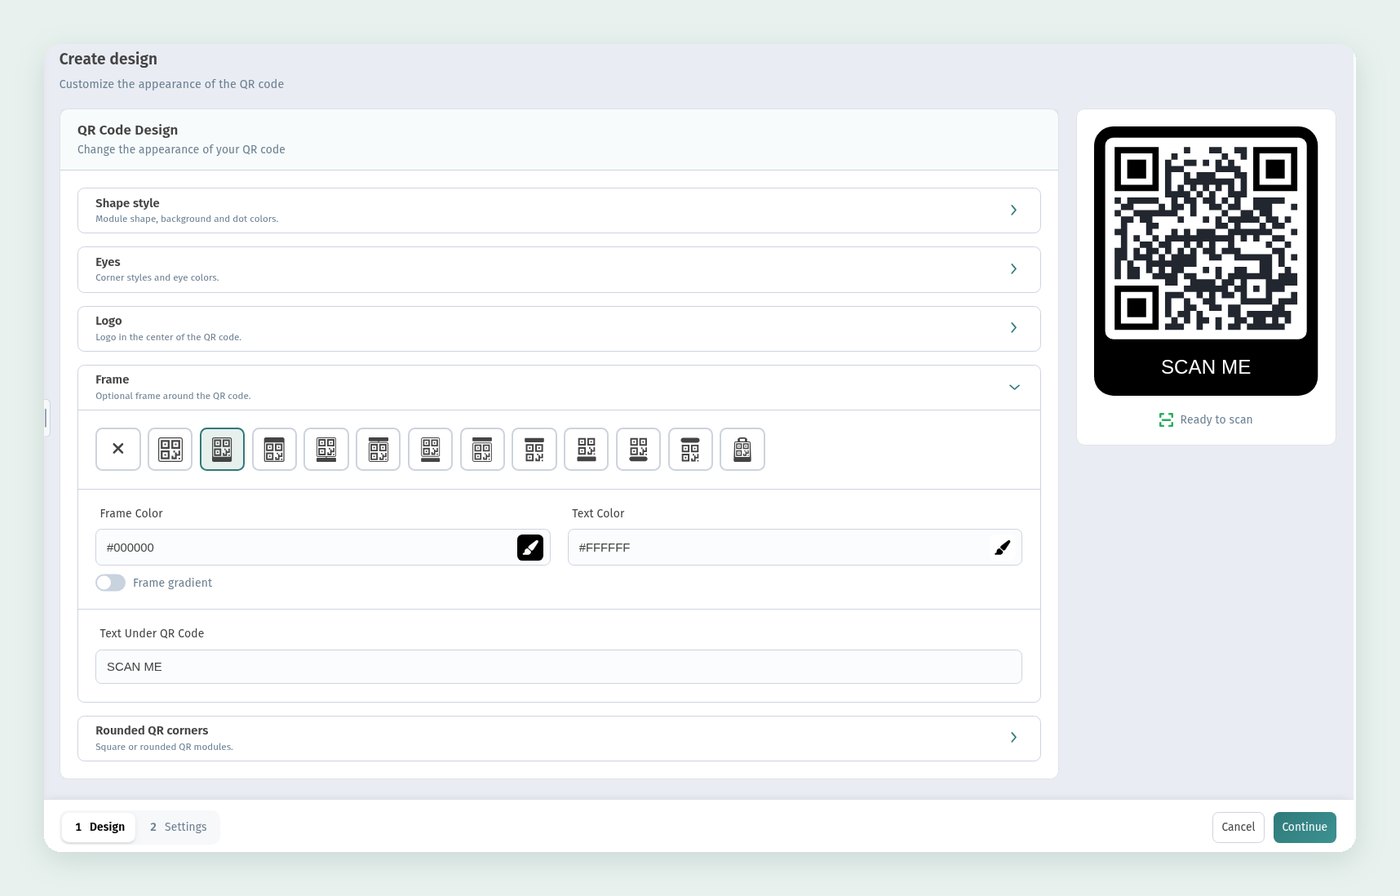
Note that several frames place the text at the top even though the field is still called "Text Under QR Code". For tables and windows, a caption below reads more naturally: eyes find the code first, then the explanation.
Step 3. Table caption: answer "what do I get right now"
A seated guest is already yours. You don't need to sell the restaurant — you need to remove the hesitation "what happens if I scan this". Wording that promises a specific, immediate result works best:
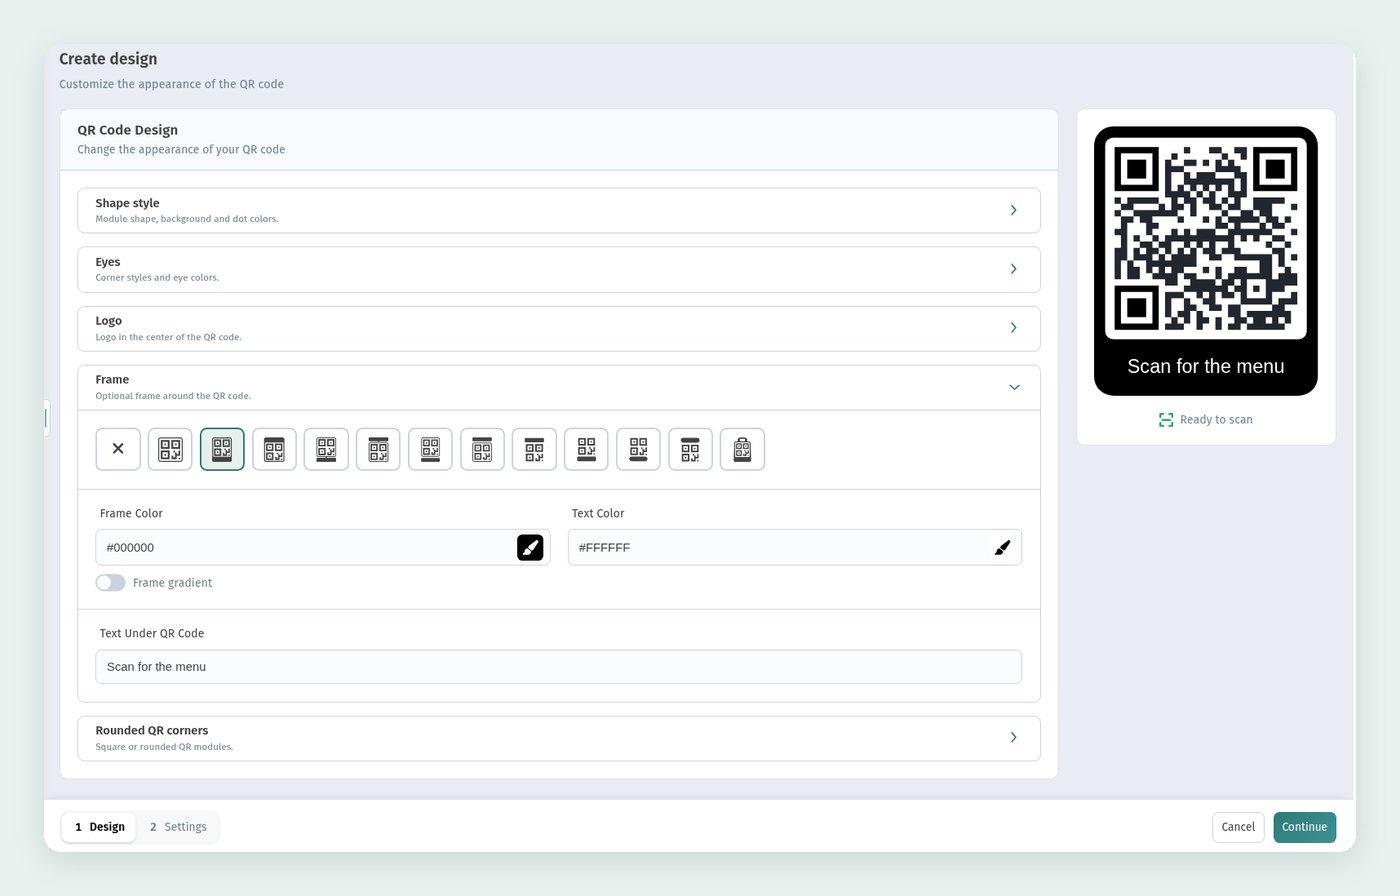
- Scan for the menu — simple and clear, our choice for tables.
- Menu and ordering from your phone — if ordering from the menu is enabled.
- Menu without waiting for a waiter — a speed angle for rush hours.
What not to write: "Welcome", "Thank you for being with us", long slogans about your cuisine. They spend the precious 40 characters without answering the guest's question.
If in-restaurant ordering is enabled, the store settings note that separate table QRs fill in the table automatically: the guest scans their own table's code and the order arrives with the right table number.
Step 4. Storefront caption: sell the action, not the code
At the window, the person is not a guest yet. "Scan me" is weak here — there is no reason to stop. Promise a benefit that is visible from the pavement:
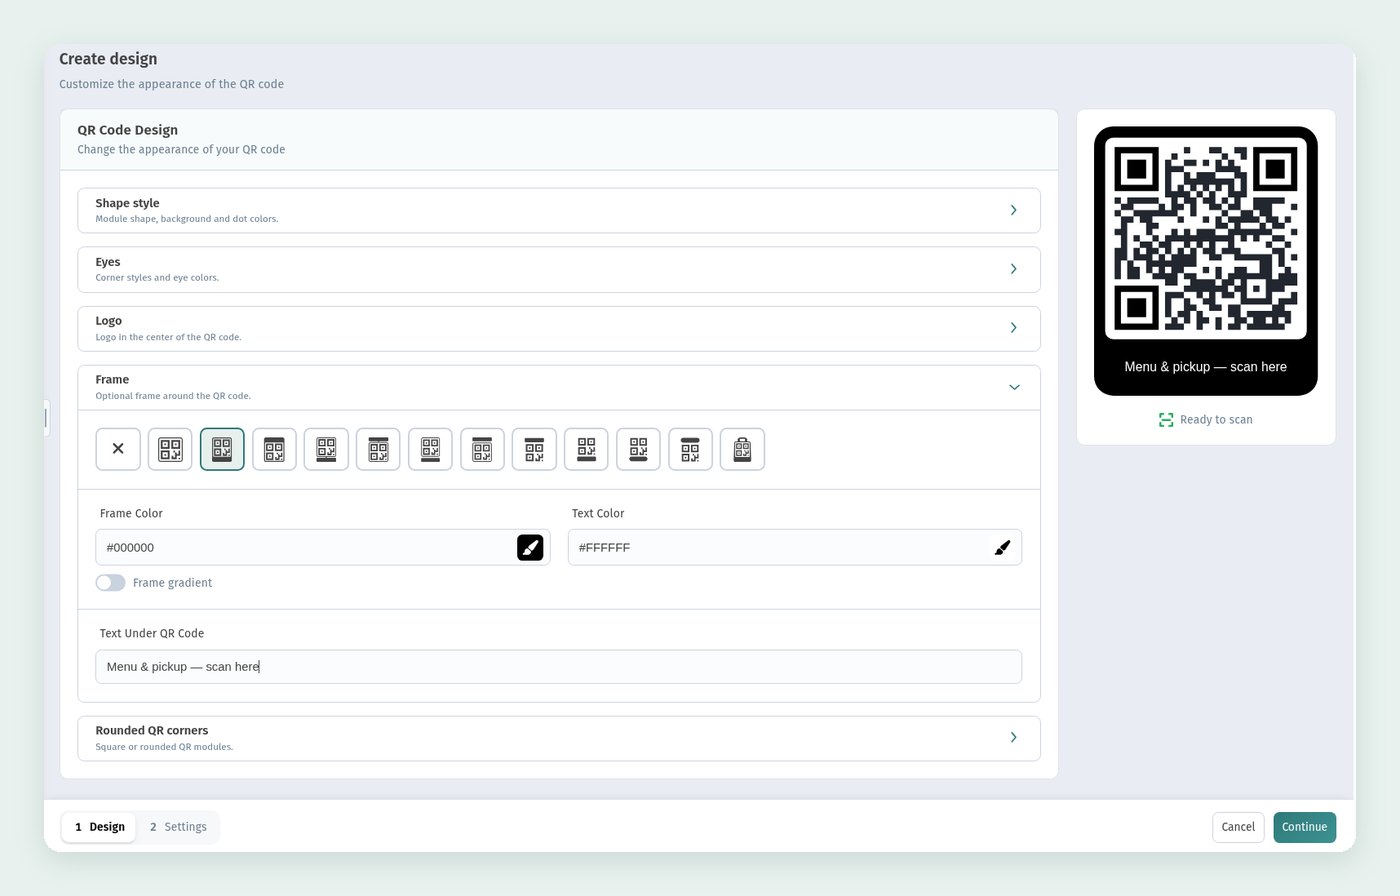
- Menu & pickup — scan here — our example: browse and take away.
- Menu and prices — no need to come in — removes the "it's probably expensive" barrier.
- Order ahead, pick up on your way — for morning coffee and takeaway lunches.
For the window, download a vector — SVG, PDF or EPS: the code prints large, and a small raster image will leave jagged edges on the modules.
Step 5. Packaging caption: a reason to come back
People see the packaging after they have eaten. The goal is a repeat order without searching for you on maps or aggregators. Short time-saving promises beat discount shouting:
- Reorder in 30 seconds — our example for a box sticker.
- Liked it? Your menu is always here — a softer line for kraft bags.
- Order direct next time — if you want to move guests away from aggregators.
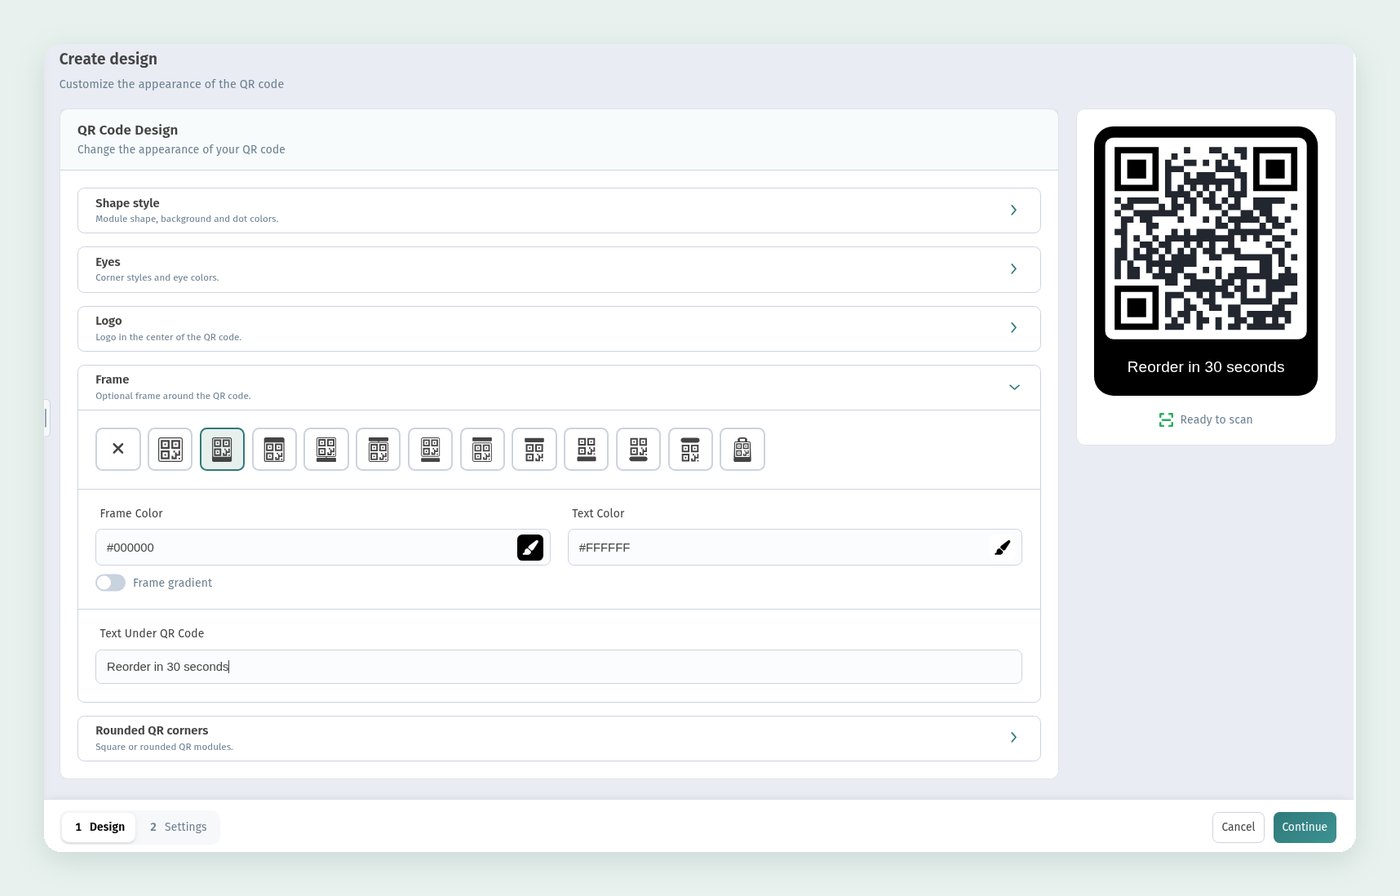
There is no separate "packaging QR" feature in the dashboard, and none is needed: it is the same store code with its own caption and its own saved design. Save it separately so it never gets mixed up with the table version.
Step 6. Colours: branded but calm
We set Frame Color to #1F4E4A (deep teal), Text Color to #FFFFFF, gradient off. You can type the values straight into the hex field next to the picker — the preview updates immediately.
Three rules for all three spots:
- The caption's contrast against the frame should be at least as strong as the code's contrast against its background. White on dark teal reads from arm's length.
- Don't make the frame louder than the code: the eye should find the code first, then the text.
- Keep a gold accent like
#B38B2Ffor the logo and printed layout, not for the code's dots.
Step 7. Download the store code
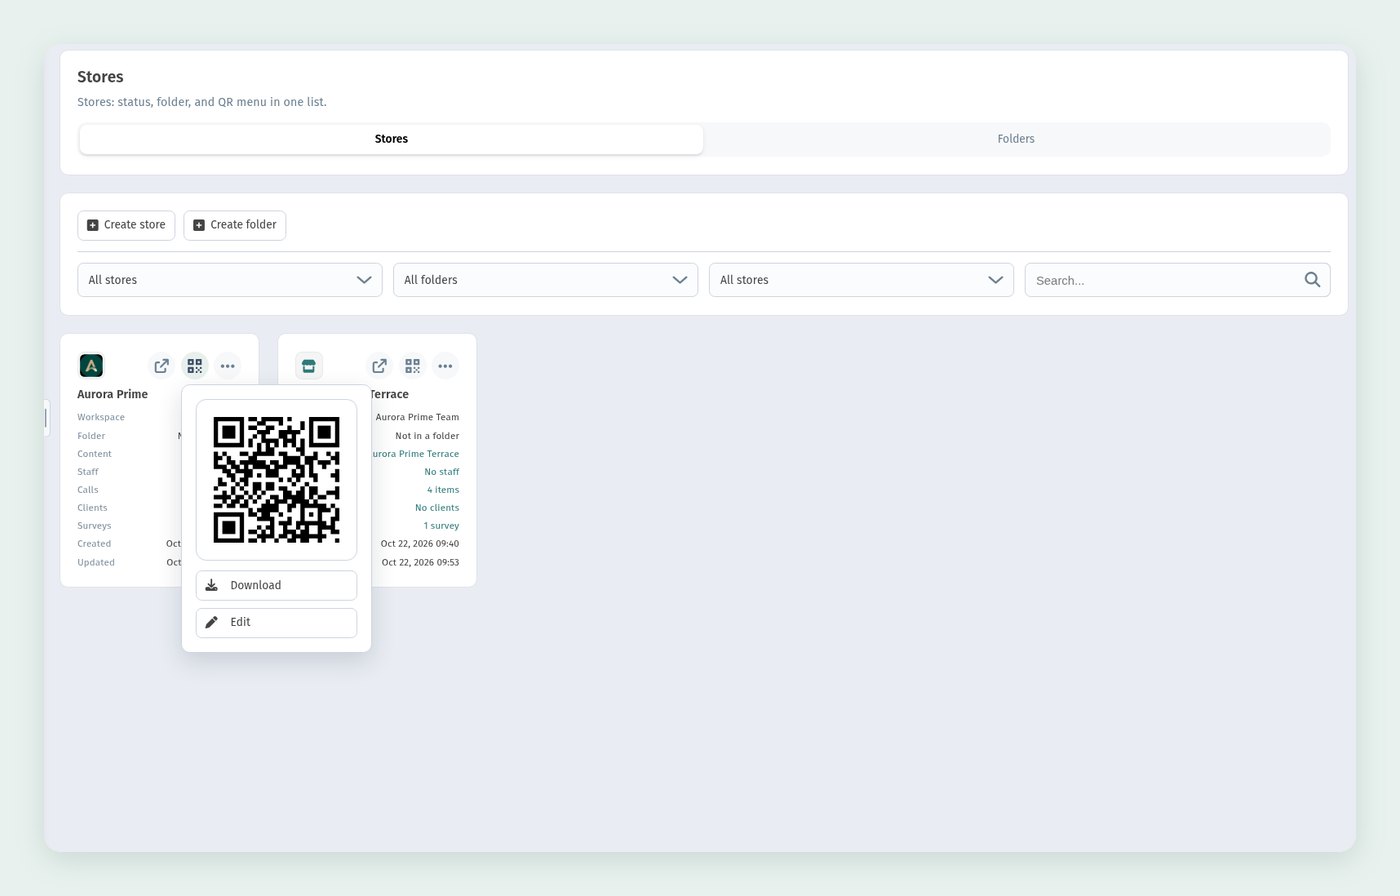
A finished design is saved in step 2 Settings (name and folder). The store's own code lives in the store list: Store → Locations (the store list), on the Aurora Prime card click the QR icon — a popup shows the code with Download and Edit. Edit opens the same editor for that store's code, where you can also apply a saved design.
Step 8. Pick the format for the job
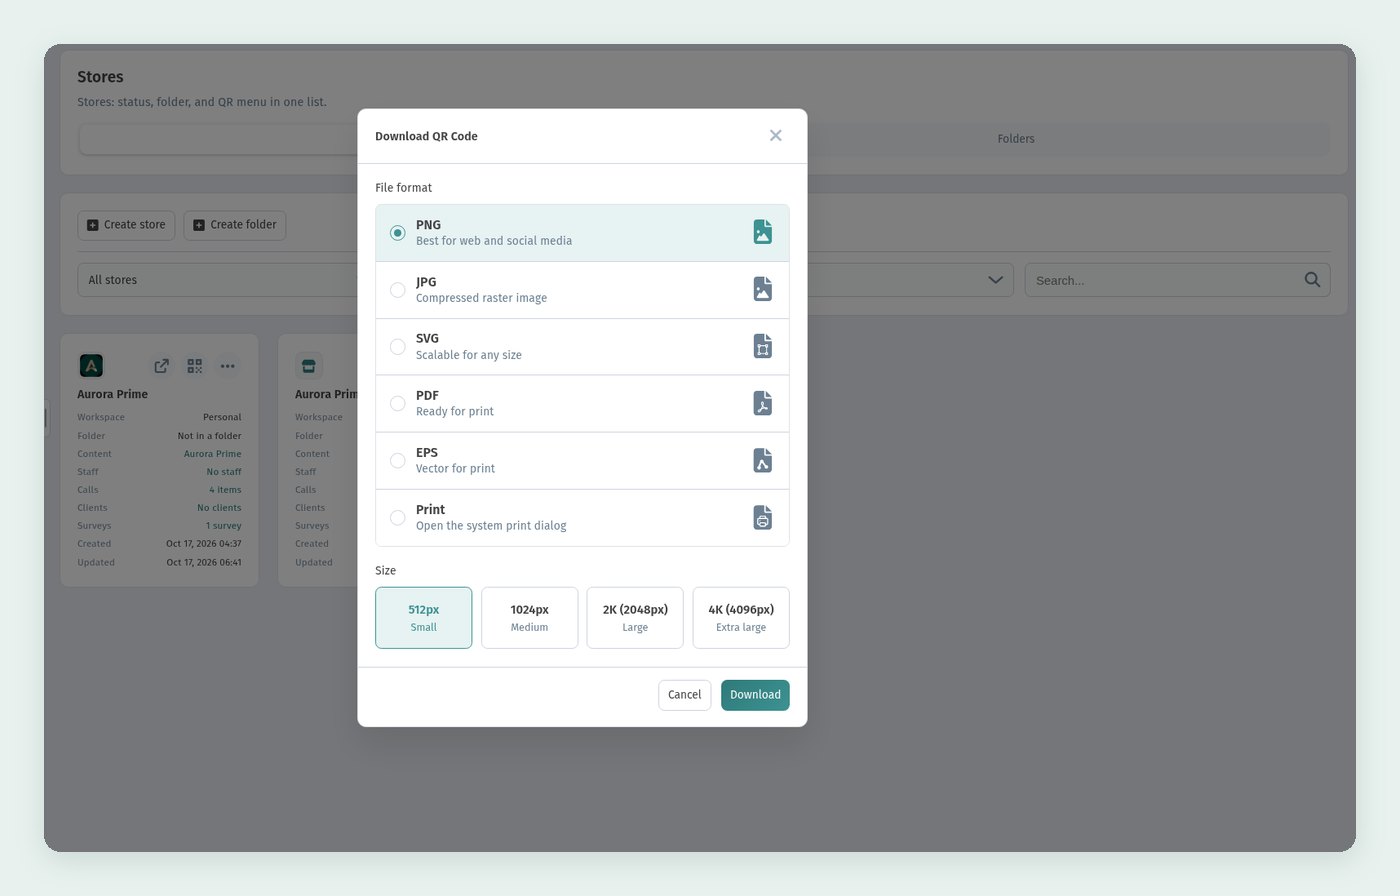
In the Download QR Code dialog choose a format:
- PNG — best for web and social media, with sizes 512px Small, 1024px Medium, 2K (2048px) Large, 4K (4096px) Extra large.
- JPG — compressed raster image.
- SVG — scalable for any size.
- PDF — ready for print.
- EPS — vector for print, for the print shop.
- Print — opens the system print dialog.
In practice: PNG 1024px is enough for table tents, PNG 2K or PDF for packaging stickers, and vector only (SVG/PDF/EPS) for windows and anything large. There is no A4 poster generator in the dashboard: the layout is built in your own editor, and the QR goes in with its caption already on it.
Step 9. Make sure guests can do what you promised
A "Menu & pickup" caption is a promise: pickup has to be switched on. Open the store list Store → Locations → Aurora Prime → Settings tab, section Order types. It has four toggles — Dine in, Takeaway, Delivery, Pickup — each with its own Caution and Late thresholds in minutes.
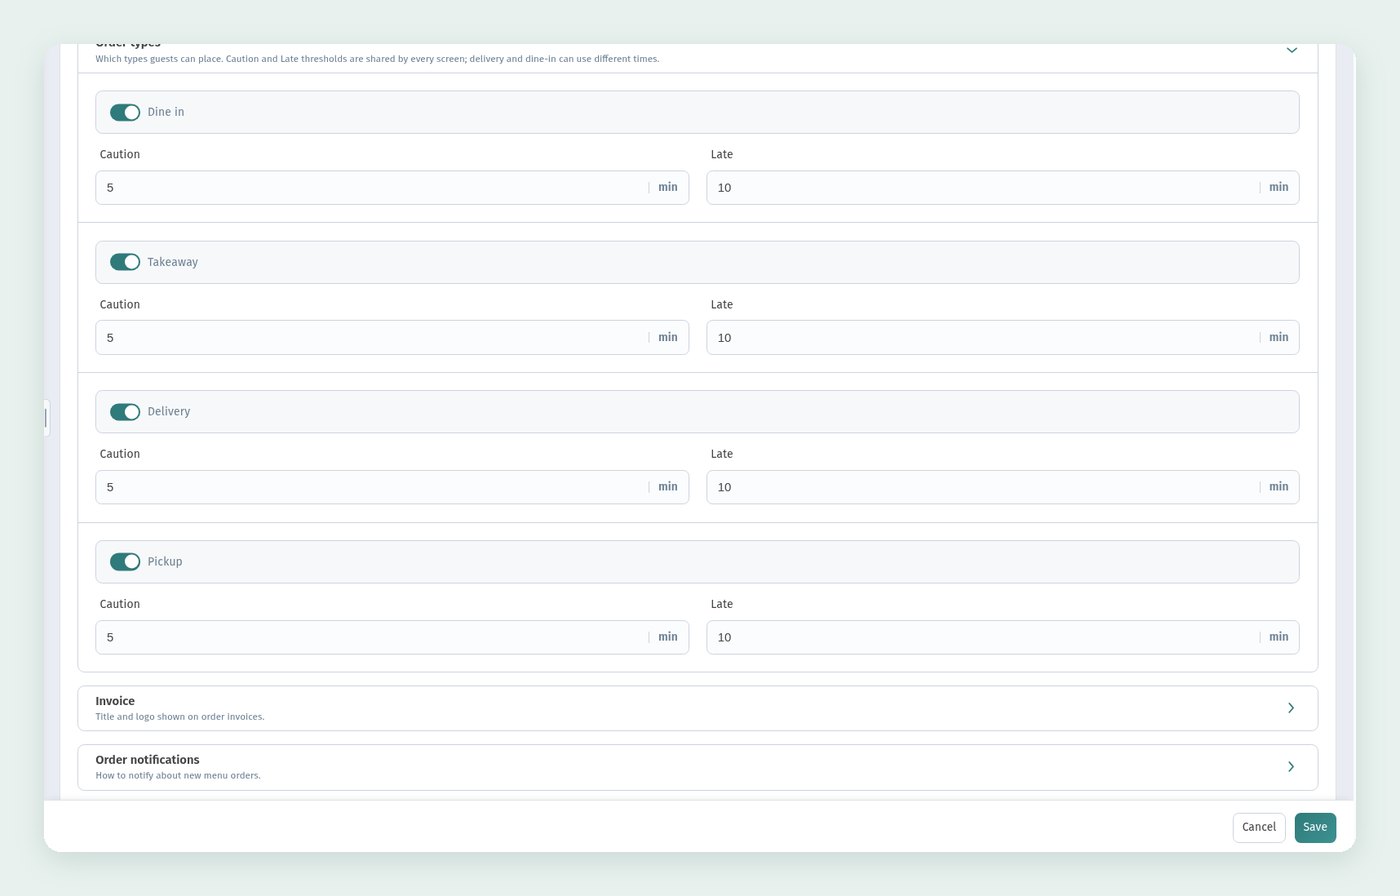
Checking the caption against these settings is the cheapest way to avoid disappointed guests: if packaging promises delivery, enable Delivery; if the table says "order from your phone", enable Dine in.
Step 10. Check with a guest's eyes
Open the public menu (ours is webqrmenu.io/kqnx5i) on a phone or in the browser's device emulation and walk the guest's path: categories, a dish, adding to the order. What you see here is exactly what a scan leads to.
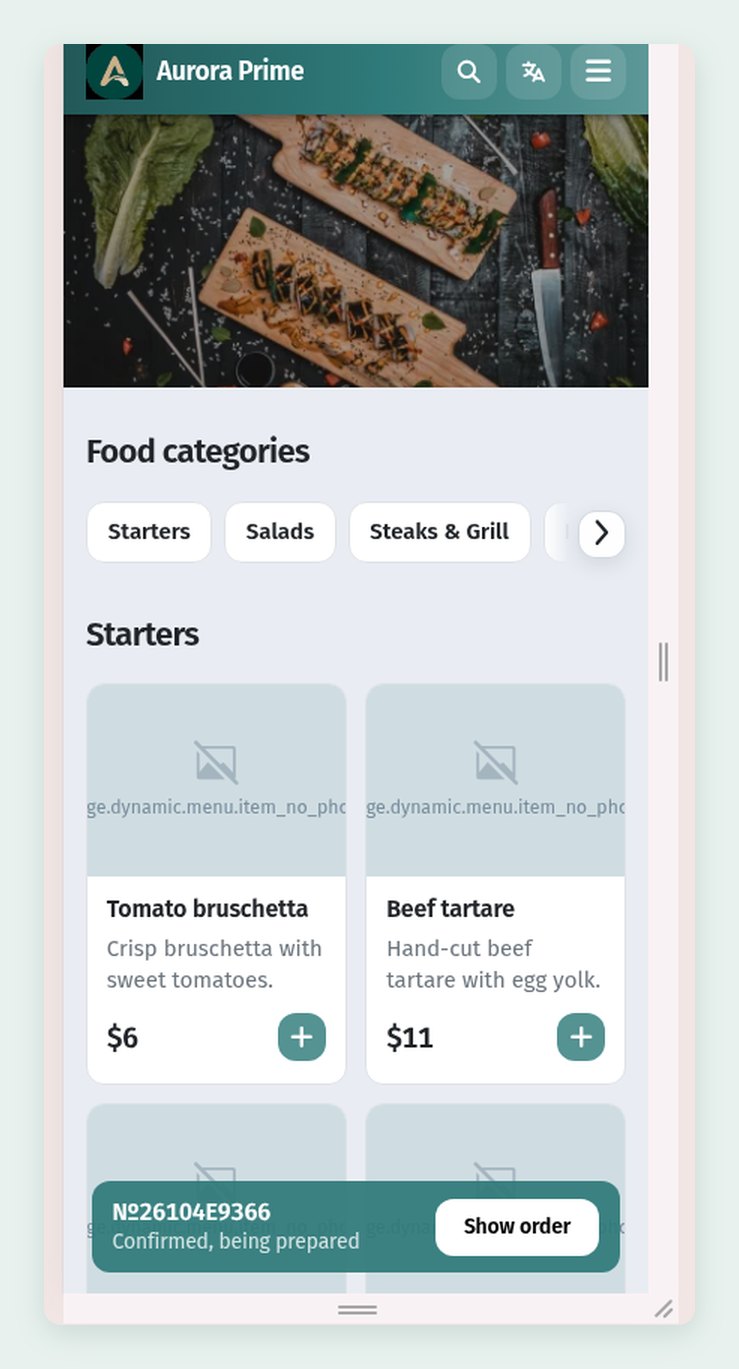
And scan a printed proof with a normal phone camera, not just from your screen: glare on paper and film changes contrast.
Quick checklist
- QR designs → Create New Design: one saved design per spot — table, window, packaging.
- Shape style: dark dots
#22262Eon a white background, no inversion. - Frame → Label Bottom unlocks Text Under QR Code, up to 40 characters.
- Table — the menu right now: "Scan for the menu".
- Window — a benefit from the pavement: "Menu & pickup — scan here".
- Packaging — a reason to return: "Reorder in 30 seconds".
- Frame Color
#1F4E4A, white Text Color, contrast over decoration. - Store → Locations → QR → Download: PNG for screens and stickers, SVG/PDF/EPS for large print.
- Check Order types — a caption must not promise something switched off.
- Open the menu on a phone and scan a printed proof before the full print run.